Highlander: Coomer MacLeod


A still image from the film 'Highlander' (1986), showing Sean Connery's character (Ramirez) pointing at Conor MacLeod (out of frame). Words are printed on the image in the same font as in the poster for the movie. The words are taken from movie dialogue but changed replacing 'Quickening' with 'Cooming': 'The sensation you feel is… The Cooming.'

Here is an alternate 'Directors Cut', with audio from the film also included.


[Here I will explain the joke, for the purposes of posterity, and SEO. It might be best to skip it.]

An old, if not dead, meme at this stage, but one I wanted to do for some weeks: Conor MacLeod as 'Coomer MacLeod'. It ties in with the even older joke about the sexual nature of the 'Quickening' experience in the Highlander movie franchise; an orgasmic rush that envelopes a person after they defeat their enemy and decapitating them. 'Real smooth shave!'

context: https://knowyourmeme.com/memes/coomer
context: https://en.wikipedia.org/wiki/Highlander_(film)

All video editing done with 'Flowblade' version 2.2 (GPL-3.0-or-later): http://https://github.com/jliljebl/flowblade

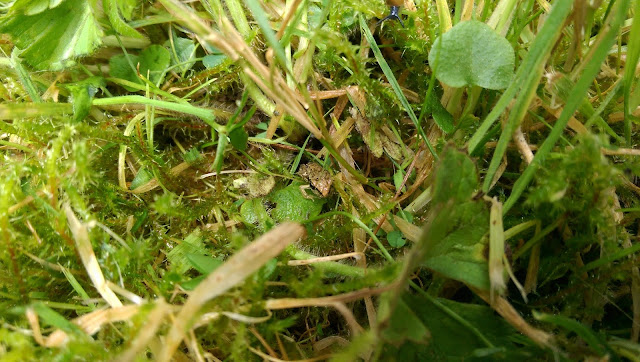
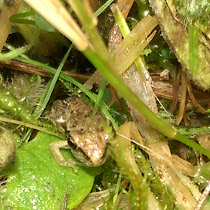
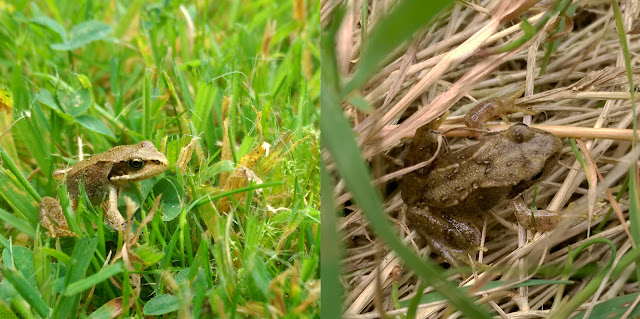
🌱🐸☘️🐌🌱 (~1cm) #garden ¹

tiny little frog and snail amid the garden moss and grass
tiny little frog and snail amid the garden moss and grass Tiny little frog and snail amid the garden moss and grass

'The moist moss makes mellow; both grass, and fellow.'²

Update: 2019.09.17 (~2.5cm)

A slightly larger frog on the grass, some weeks later.

¹ originally published: August 17, 2019 https://twitter.com/oioiiooixiii/status/1162634207274967040
² originally published: August 17, 2019 https://twitter.com/oioiiooixiii/status/1162640769158733824

Degrading jpeg images with repeated rotation - via Bash (FFmpeg and ImageMagick)


A continuation of the decade-old topic of degrading jpeg images by repeated rotation and saving. This post briefly demonstrates the process using FFmpeg and ImageMagick in a Bash script. Previously, a Python script achieving similar results was published, which has recently been updated. There are many posts on this subject and they can all be accessed by searching for 'jpeg rotation' tag.
posts: https://oioiiooixiii.blogspot.com/search/label/jpeg%20rotation
The two basic commands are below. Both versions rotate an image 90 degrees clockwise, and each overwrite the original image. They should be run inside a loop to create progressively more degraded images.

ImageMagick: The quicker of the two, it uses the standard 'libjpg' library for saving images.
mogrify -rotate "90" -quality "74" "image.jpg"

FFmpeg: Saving is done with the 'mjpeg' encoder, creating significantly different results.
ffmpeg -i "image.jpg" -vf "transpose=1" -q:v 12 "image.jpg" -y

There are many options and ways to extend each of the basic commands. For FFmpeg, one such way is to use the 'noise' filter to help create entropy in the image while running. It also has the effect of discouraging the gradual magenta-shift caused by the mjpeg encoder.

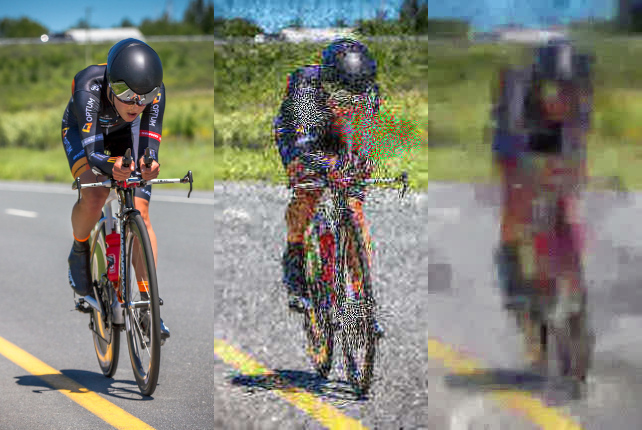
A functional (but basic) Bash script is presented later in this blog post. It allows for the choice between ImageMagick or FFmpeg versions, as well as allowing some other parameters to be set. Directly below is another montage of images created using the script. Run-time parameters for each result are given at the end of this post.
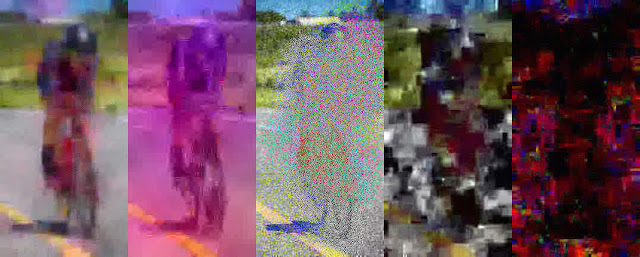


Running the script without any arguments (except for the image file name) will invoke ImageMagick's 'mogrify' command, rotating the image 500 times, and saving at a jpeg quality of '74'. Note that when the FFmpeg version is running, the jpeg quality is crudely inverted, to use the 'q:v' value of the 'mjpeg' encoder.

The parameters for the script: [filename: string] [rotations: 1-n] [quality: 1-100] [frames: (any string)] [version: (any string for FFmpeg)] [noise: 1-100]
#!/bin/bash
# Simple Bash script to degrade a jpeg image by repeated rotations and saves,
# using either FFmpeg or ImageMagick. N.B. Starting image must be a jpeg.

# Example: rotateDegrade.sh "image.jpg" "1200" "67" "no" "FFmpeg" "21"
# Run on image.jpg, 1200 rotations, quality=67, no frames, use FFmpeg, noise=21

# source: oioiiooixiii.blogspot.com
# version: 2019.08.22_13.57.37

# All relevent code resides in this function
function rotateDegrade()
{
   local rotations="${2:-500}" # number of rotations
   local quality="${3:-74}" # Jpeg save quality (note inverse value for FFmpeg)
   local saveInterim="${4:-no}" # To save every full rotation as a new frame
   local version="${5:-IM}" # Choice of function (any other string for FFmpeg)
   local ffNoise="${6:-0}" # FFmpeg noise filter

   # Name of new file created to work on
   local workingFile="${1}_r${rotations}-q${quality}-${version}-n${ffNoise}.jpg"
   cp "$1" "$workingFile" # make a copy of the input file to work on
   # N.B. consider moving above file to volatile memory e.g. /dev/shm

   # ImageMagick and FFmpeg sub-functions
   function rotateImageMagick() {
      mogrify -rotate "90" -quality "$quality" "$workingFile"; }
   function rotateFFmpeg() {
      ffmpeg -i "$workingFile" -vf "format=rgb24,transpose=1,
         noise=alls=${ffNoise}:allf=u,format=rgb24" -q:v "$((100-quality))"\
         "$workingFile" -y -loglevel panic &>/dev/null; }

   # Main loop for repeated rotations and saves
   for (( i=0;i<"$rotations";i++ ))
   {
      # Save each full rotation as a new frame (if enabled)
      [[ "$saveInterim" != "no" ]] && [[ "$(( 10#$i%4 ))" -lt 1  ]] \
      && cp "$workingFile" "$(printf %07d $((i/4)))_$workingFile"

      # Rotate by 90 degrees and save, using whichever function chosen
      [[ "$version" == "IM" ]] \
      && rotateImageMagick \
      || rotateFFmpeg

      # Display progress
      displayRotation "$i" "$rotations"
   }
}

# Simple textual feedback of progress shown in terminal
function displayRotation() { clear;
   case "$(( 10#$1%4 ))" in
   3) printf "Total: $2 / Processing: $1 🡄  ";;
   2) printf "Total: $2 / Processing: $1 🡇  ";;
   1) printf "Total: $2 / Processing: $1 🡆  ";;
   0) printf "Total: $2 / Processing: $1 🡅  ";;
   esac
}

# Driver function
function main { rotateDegrade "$@"; echo; }; main "$@"
download: rotateDegrade.sh

python version: https://oioiiooixiii.blogspot.com/2014/08/jpeg-destruction-via-repeated-rotate.html
original image: https://www.flickr.com/photos/flowizm/19148678846/ (CC BY-NC-SA 2.0)

parameters for top image, left to right:
original | rotations=300,quality=52,version=IM | rotations=200,quality=91,version=FFmpeg,noise=7

parameters for bottom image, left to right:
rotations=208,quality=91,version=FFmpeg,noise=7 | rotations=300,quality=52,version=FFmpeg,noise=0 | rotations=500,quality=74,version=IM | rotations=1000,quality=94,version=FFmpeg,noise=7 | rotations=300,quality=94,version=FFmpeg,noise=16

Red Dawn 2019: Reinstate 八一

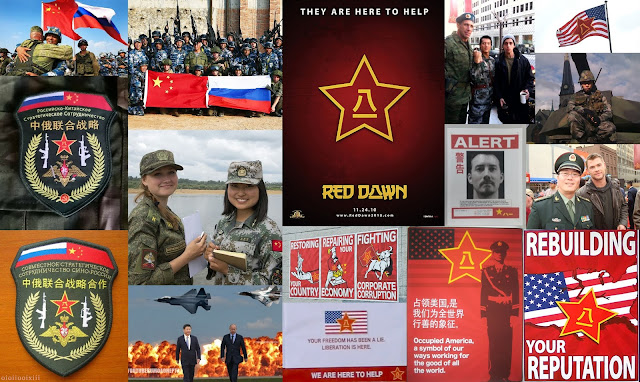
montage image: on the left hand side; various images relating to real-world good relations between Russia and China, politically and militarily. On the right hand side, photos and images relating to the original production of Red Dawn (2012) movie; showing Chinese propaganda posters and military forces.

Given the current state of things¹, it might be worth considering a re-release of 'Red Dawn (2012)', containing the original People's Republic of China story-line and imagery. It might not make the film any better, but at least the story and scenery would make a modicum more sense. Either-way, it would be pretty cool to see Chinese and Russian military on American streets, even in such a silly film as this.

¹ https://www.reuters.com/article/us-un-nuclear/risk-of-nuclear-war-now-highest-since-ww2-un-arms-research-chief-says-idUSKCN1SR24H

Below is a small list of [some defunct] URLs relating to the original version of film. There are images and texts about the original making of the film, as well as reviews and concerns about its release (circa 2010).

film info: https://en.wikipedia.org/wiki/Red_Dawn_(2012_film)
official website: http://reddawn2010.com/
images of filming in Detroit: http://detroitfunk.com/red-dawn/
'Russians' turn up on set: http://reddawn2010.com/index.php?option=com_content&view=article&id=88:those-russians-just-cant-stay-out
concept art: http://www.productionillustration.com/gallery/red-dawn/
Some posters used in the film: http://hiro-tan.org/~ekoontz/red_dawn/
Review of the original version: http://www.libertasfilmmagazine.com/exclusive-libertas-sees-the-uncensored-version-of-mgms-new-red-dawn/
Anti-film preview: https://www.theawl.com/2010/05/real-america-red-dawn-remade-china-is-coming-for-our-children/
Anti-Film website: http://www.anti-reddawn2010.com/
Red Dawn News Twitter: https://twitter.com/reddawnnews
Forum thread discussing film changes: https://www.alternatehistory.com/forum/threads/red-dawn-remake-finally-coming-out.213393/


Some other images relating to the film in its current state:


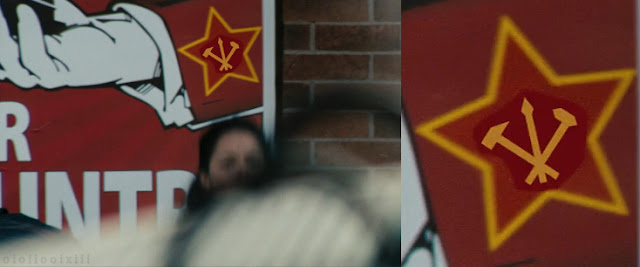
A poor attempt at repainting one of the PLA stars to one representing the KPA.


A scene in the film where the symbol on a sign rapidly changes back and forth.
[see full video: https://drive.google.com/open?id=1JYxl5qNOCYY7HUoUkPzeblFcO07ueg-f]


Q2hpbmVzZSBidWxsZXRzIGV2aXNjZXJhdGluZyBBbWVyaWNhbiBjcmFuaXVtcy4K
The average colour of each frame in the film.
[explanation: https://oioiiooixiii.blogspot.com/2018/09/ffmpeg-fapa-frame-averaged-pixel-array.html]

FFmpeg: CRT Screen Effect


A simple attempt at creating a [stylised] 'CRT screen' effect with FFmpeg. Loaded with the common CRT effect tropes and clichés; interlaced lines, noise, chromatic aberration, bloom etc.

The filterchains were constructed to be modular; allowing them to be included or removed, as desired. The ideas included in these filterchains might be of more use in general, than the whole effect itself.

#!/bin/bash

# A collection of FFmpeg filterchains which can be used to create a stylised
# 'CRT screen' effect on given input.
#
# The filter-chains have been split apart to increase modularity at the cost of
# sacrificing simplicity and increasing redundant code. Filter-chains can be
# added or removed in various orders, but special attention must be paid to
# selecting the correct termination syntax for each stage.
#
# Includes basic demonstration FFmpeg command which takes "$1" input file.
#
# Version: 2019.04.06_02.49.13
# Source https://oioiiooixiii.blogspot.com

### FILTERCHAINS #############################################################

# Reduce input to 25% PAL resolution
shrink144="scale=-2:144"

# Crop to 4:3 aspect ratio at 25% PAL resolution
crop43="crop=180:144"

# Create RGB chromatic aberration
rgbFX="split=3[red][green][blue];
      [red] lutrgb=g=0:b=0,
            scale=188x144,
            crop=180:144 [red];
      [green] lutrgb=r=0:b=0,
              scale=184x144,
              crop=180:144 [green];
      [blue] lutrgb=r=0:g=0,
             scale=180x144,
             crop=180:144 [blue];
      [red][blue] blend=all_mode='addition' [rb];
      [rb][green] blend=all_mode='addition',
                  format=gbrp"

# Create YUV chromatic aberration
yuvFX="split=3[y][u][v];
      [y] lutyuv=u=0:v=0,
          scale=192x144,
          crop=180:144 [y];
      [u] lutyuv=v=0:y=0,
          scale=188x144,
          crop=180:144 [u];
      [v] lutyuv=u=0:y=0,
          scale=180x144,
          crop=180:144 [v];
      [y][v] blend=all_mode='lighten' [yv];
      [yv][u] blend=all_mode='lighten'"

# Create edge contour effect
edgeFX="edgedetect=mode=colormix:high=0"

# Add noise to each frame of input
noiseFX="noise=c0s=7:allf=t"

# Add interlaced fields effect to input
interlaceFX="split[a][b];
             [a] curves=darker [a];
             [a][b] blend=all_expr='if(eq(0,mod(Y,2)),A,B)':shortest=1"

# Re-scale input to full PAL resolution
scale2PAL="scale=720:576"

# Re-scale input to full PAL resolution with linear pixel
scale2PALpix="scale=720:576:flags=neighbor"

# Add magnetic damage effect to input [crt screen]
screenGauss="[base];
             nullsrc=size=720x576,
                drawtext=
                   fontfile=/usr/share/fonts/truetype/freefont/FreeSerif.ttf:
                   text='@':
                   x=600:
                   y=30:
                   fontsize=170:
                   fontcolor=red@1.0,
             boxblur=80 [gauss];
             [gauss][base] blend=all_mode=screen:shortest=1"

# Add reflections to input [crt screen]
reflections="[base];
             nullsrc=size=720x576,
             format=gbrp,
             drawtext=
               fontfile=/usr/share/fonts/truetype/freefont/FreeSerif.ttf:
               text='€':
               x=50:
               y=50:
               fontsize=150:
               fontcolor=white,
             drawtext=
               fontfile=/usr/share/fonts/truetype/freefont/FreeSerif.ttf:
               text='J':
               x=600:
               y=460:
               fontsize=120:
               fontcolor=white,
             boxblur=25 [lights];
             [lights][base] blend=all_mode=screen:shortest=1"

# Add more detailed highlight to input [crt screen]
highlight="[base];
             nullsrc=size=720x576,
             format=gbrp,
             drawtext=
               fontfile=/usr/share/fonts/truetype/freefont/FreeSerif.ttf:
               text='¡':
               x=80:
               y=60:
               fontsize=90:
               fontcolor=white,
             boxblur=7 [lights];
             [lights][base] blend=all_mode=screen:shortest=1"

# Curve input to mimic curve of crt screen
curveImage="vignette,
            format=gbrp,
            lenscorrection=k1=0.2:k2=0.2"

# Add bloom effect to input [crt screen]
bloomEffect="split [a][b];
             [b] boxblur=26,
                    format=gbrp [b];
             [b][a] blend=all_mode=screen:shortest=1"

### FFMPEG COMMAND ###########################################################

ffmpeg \
   -i "$1" \
   -vf "
         ${shrink144},
         ${crop43},
         ${rgbFX},
         ${yuvFX},
         ${noiseFX},
         ${interlaceFX},
         ${scale2PAL}
         ${screenGauss}
         ${reflections}
         ${highlight},
         ${curveImage},
         ${bloomEffect}
      " \
   "${1}__crtTV.mkv"

exit 0
download script: ffmpeg_CRT-effect.sh

A bank of 'screens' displaying different inputs.


Some alternate choices of filterchains.


source video: https://www.youtube.com/watch?v=8SPUHGRXQUY